Creating and Printing Reports
Office Express allows you to design your own invoices, workorders, route sheets and reports. Office Express comes with a very powerful report designer that allows you to make sophisticated reports quickly and easily.
Printing Reports
Click on the Reports icon at the top of the Office Express window. The Reports page will be displayed as shown below.
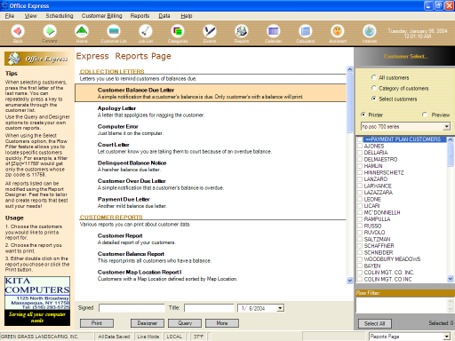
The reports page consists of the list of reports, a box at the top right that allows you to define which customers to print a document or report for, customer selection list and a row filter edit box.
Office Express comes with many already designed reports which make up the report list. To print a report, simply, select a report in the list, choose which customers you want to receive the report on the right and click the Print button. That's it!
TIP: Use the row filter box to narrow the customer list. For example, you could enter: [Balance]>200 into the filter edit box and only the customers who have a balance greater than $200.00 will be displayed in the customer selection area. You can then choose a collection letter to print to the customers you choose.
As far as printing the "stock" documents and reports that's all there is to it.
NOTE: The collection letters require that customers have a balance greater than zero to print. Do not be alarmed in the beginning if you are checking out these documents and they don't print. Simply, select a customer with a balance.
Creating or Modify Reports Using the Report Designer
After you are familiar with Office Express, you'll want to start creating or modifying reports. You are free to change any existing report, invoice, so on to fit your tastes. You can also create your own reports if there is a custom report that you need that is not included with the shipped reports.
To begin how to use the Report Designer click here...
Home | Getting Started | Table of Contents | The Report Designer |