Express Scheduling
The Express Schedule feature is also a great feature to
use if you want to make price changes to many customers at once.
This section shows you how to use Office Express' Express Schedule feature. This feature allows you to choose a job and
schedule all the customers who are to get the job.
To use the Express Schedule feature select the Scheduling option
from the Office Express Main menu. Then select Express Schedule Customer Work. You can also access the Express Schedule feature
from the Office Express Home Page as shown in the picture to the left.
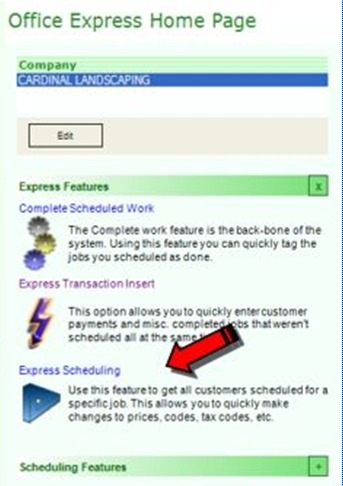
The image above shows you how to access the Express Scheduling feature from Office Express' Home Page. You will then be asked to select a job that you want to schedule.
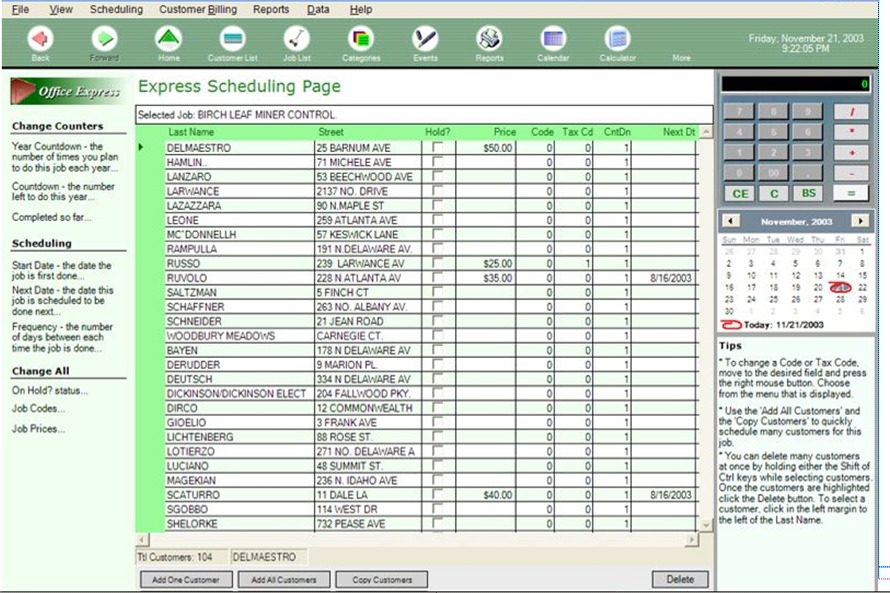
Above is an image of the Express Scheduling Page. On the
left edge of the page is the Options Toolbox. These options allow you to make
changes to all customers at once. At the bottom of the Express Schedule page are
a series of buttons for Adding and Removing Customers. To the far right of the
page are a Calculator and a Calendar to assist you in your scheduling.
Notice that Express Schedule has the same fields as you
saw when inserting scheduled jobs for a customer. This view allows you to change
all the same fields. You can go customer -by-customer typing in changes or you
can use one of the options to the left of the window for changing many customers
at once.
TIP: You can sort the list by clicking the heading of any column. For example, if you wanted the list sorted by Crew, move to the mouse cursor to the top of the Crew column and click on the “Crew” label.
After you have made all the changes you wanted, click on
the Save and Exit button at the bottom of the window.
Home | Table of Contents | Office Express Basics | Express Scheduling Part 2 | Scheduling Jobs |