Creating Template Customers
Creating template customers will save you time and will also reduce the chance of typing errors when inserting your customers. The information from a template customer will be copied to a new customer thus reducing having to type the same information over and over.
With a little imagination, you can create as many template customers as you want to best suit the needs of your business.
NOTE: Without trying to confuse beginners, any customer can be used to copy their information to another customer. The advantage of using template customers is you only define common data among a group of customers and not customer specific data.
Customer Templates Overview
Customer templates are used to copy general customer information from the template to any new customer you insert. In essence the template customer defines "defaults" for various pieces of information.
For example, if you have many customers in a single town, you would create a template for that town. Give the customer template a name something like- *Template-SMITHTOWN. You then define the Town, State, Zip, Area Code, Tax Code and any other information you want to define a value for SMITHTOWN.
Once the template customer has been saved, you copy the information from the template customer to a new customer thus removing the need to retype any of the information stored in the template.
We will go into detail on how to create a customer template later in this document.
Using a Customer Template to Insert a New Customer
To insert a new customer using a template...
step 1. make sure you are on your main customer page.
step 2. select the template, or customer, you want to copy information from.
step 3. click the right mouse button on this customer, a "pop-up" menu will be displayed.
step 4. select the Use this Customer as a Template to Insert a Customer... option.
step 5. the information from the selected customer will be copied to the new customer, you then fill the fields in the Insert Customer wizard as you normally would.
Scheduled Job Customer Templates Overview
This type of customer template is used when scheduling jobs. Scheduling jobs can be the most laborious and time consuming part of setting up Office Express Pro.
Again, to reduce the chance of errors and to save time, you'll create customer templates that will contain the scheduled job information for many of your customers.
For example, if most of your full service customers receive mostly the same services, you create a scheduled job template that defines the jobs these customers receive.
Office Express has a feature that allows you to copy the scheduled jobs, and the information for each job, from one customer to another. You'll use this feature to copy the jobs from the template customer to one of your actual customers.
When defining a Scheduled Job Template you should give it a distinctive name such as "*Scheduled Jobs- FULL SERVICE". You can have as many templates as you want. Other names might be: "*Scheduled Jobs- CONTRACTED" and "*Scheduled Jobs- ESTIMATE".
Note: Don't be afraid to over schedule jobs for a customer. Office Express allows you to schedule as many jobs as you want for each customer. You can schedule a job even though you you might not be sure whether you will actually do the job, but you can have the job in the customer's job list. This is especially useful when giving estimates. You can keep a list of each job you estimated, with prices, defined thus eliminating the need to keep a paper record of the estimate.
Using a Scheduled Job Template to Schedule Jobs for a Customer
step 1. make sure you are on your main customer page.
step 2. select the customer you want to copy scheduled jobs to.
step 3. click the Scheduled tab at the bottom of the right side of the screen to view the customers scheduled jobs.
step 4. click the right mouse button on the customer's scheduled jobs, a "pop-up" menu will be displayed.
step 5. select Copy All the Jobs from Another Customer... option.
step 6. a dialog box will be displayed with your list of customers. Select the customer who already has jobs scheduled that you want to copy from and click the Select button.
step 7. the schceduled job information from the selected customer will be copied to the customer, you can then edit prices and other information as you normally would.
CREATING TEMPLATES
NOTE: The steps for defining a Customer Template and a Scheduled Job Template are exactly the same. In fact, one template can double as both if you need.
The only difference between the two is with a Scheduled Job Template, you first define the template name and then you schedule jobs for the template you just defined.
Selecting the Customer Insert option
You can insert customers from two different places in Office Express. The Office Express Home page allows you to quickly insert customers. Or, if you click the Customers icon in the navigation bar at the top of the screen you can work from the Customer Page.
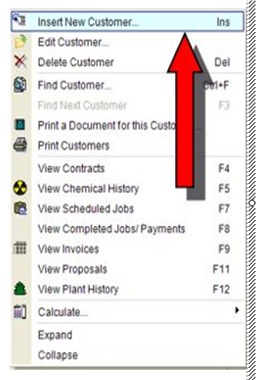
To insert from the customer page either press the Insert
key on your keyboard or click the right mouse button on the list of customers.
If you clicked the right mouse button a menu like the one above will be
displayed. Select the Insert New Customer option.
When you select the Insert option, the Customer Insert Wizard
will be displayed. The Customer Insert Wizard consists of five different
pages. This topic will focus on the first page of the wizard, assigning
the customer a category.
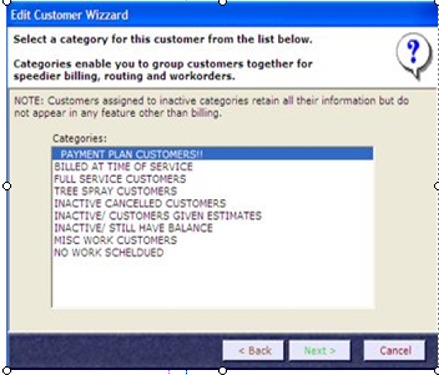
ASSIGNING A CATEGORY
As described in the About Categories lesson, Office
Express requires that every customer be assigned to a category.
The first page of the wizard lists all the categories you
have in your category list. Simply highlight the category you want the customer
to be assigned to and click the Next button at the bottom-right of the wizard.
NOTE: You can change the customer's category at any
time. After you have all your customers inserted you can fine tune your customer
list later on and quickly move customers from category-to-category.

DEFINING THE CUSTOMER ADDRESS
Enter the name for your template into the Last Name field.
Office Express requires that you at least enter a last name.
Notice under the wizzard page header there are three tabs,
Service Address, Billing Address and Phone numbers.
Click on each tab to enter information into any field you want to define
for this template.
Click the Next button to move to the next page in the Wizard.
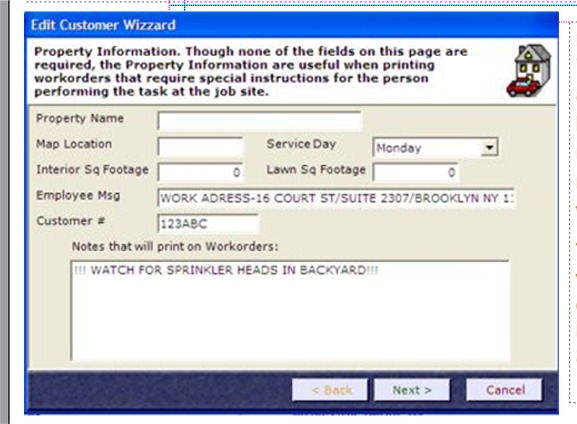
PROPERTY INFORMATION
The next page is for misc. customer information. None of the fields are required. This page has fields that are useful when printing workorders and route sheets. The Employee msg and Workorder notes are useful in this context.
The fields you might want to define default values for are: Map Location, and Service Day.
If most customers in the town
for this template receive a weekly maintenance on the same day, assign
service day-of-the-week field.
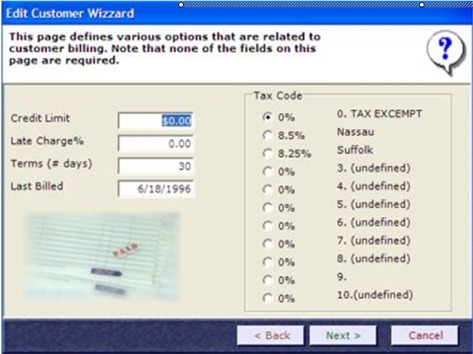
BILLING OPTIONS
This page affects the customer balance. The only required
piece of information is choosing a tax code for the town of the template.
If you followed the previous lessons the tax rates should already have
been set up. Click on the tax rate you want to default for this template.
The Credit Limit is the amount the customer balance is allowed
to grow before Office Express puts all the customers jobs on hold.
The Terms field defines the number of days an invoice can go unpaid
before it is considered past due.
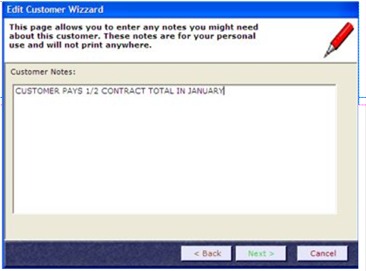
CUSTOMER NOTES
The last page of the wizard is for entering customer notes.
You are free to use this for anything you choose about the customer.
When you are done with this page, click the Next button
at the bottom-right of the wizard. You will then see the Wizard Finish
page where you click the Finish button to save the template.
Once the template has been saved, if this is a Scheduled Job template you will then begin scheduling jobs for the new template customer. If you need help on how to schedule jobs, click here...
Home | Table of Contents | Office Express Basics | Inserting Customers | Viewing Customers | Scheduling Jobs | About Customer Categories |