Using Office Express for the First Time
The first time you use Office Express you should define
your Company Settings. To do this you click on the Edit
button located in the Company
Box on the Office Express
Home Page.
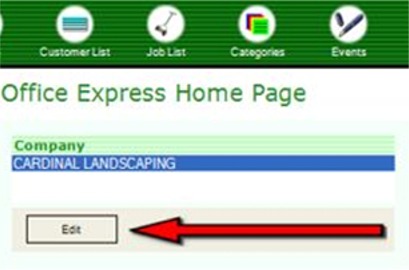
The image above highlights this button by pointing to it with the red arrow. After you click the Edit button, you will see a dialog box like the one below.
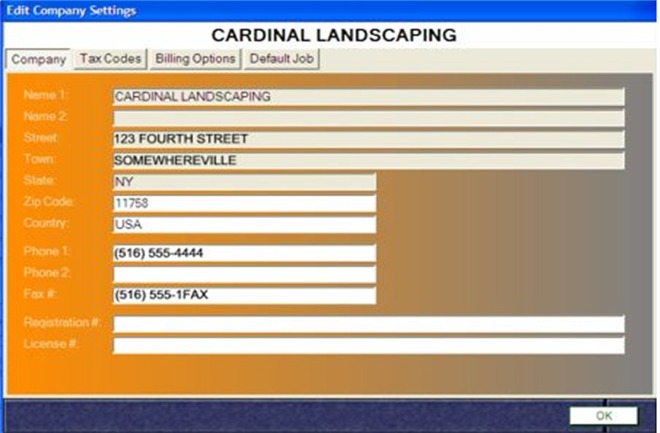
If there is any piece of information you want to change,
you can change it now. The more important issue is to define the tax rates in
your area.
The dialog
box consists of four pages accessed through the four buttons at the top of the
dialog box. The next step is to click on the Tax Codes button.
The dialog box will change to look like the image below.
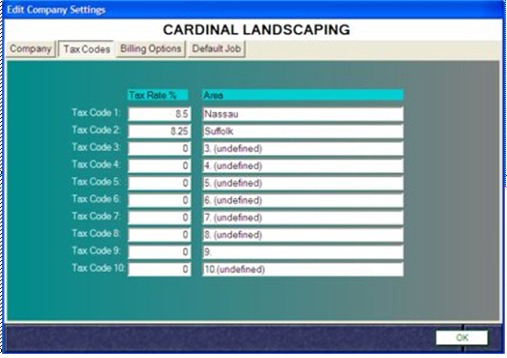
Now you can define the tax rates in your area. NOTE:
When entering a tax rate enter the rate in the following format : 1.23 not .123.
For example, if the tax rate is eight and 1/4 percent type in 8.25, not .0825.
Office
Express allows you to enter up to ten different tax rates while tax code 0 is
reserved for non-tax customers, for a total of eleven tax choices.
When you are
done, click on the Billing Options button where you can enter some overhead information
that will be used when you print invoices.
Lastly, if
you have a weekly maintenance route, click the Default Job button
at the top of the dialog box. A list of services will be displayed. Locate the
maintenance job in the list and click on it. When you begin to complete work,
you’ll understand what this did.
When done,
click the OK button located at the bottom right of the dialog box.